Practice
Welcome to my Practice page. Majority of these mini-projects are created on CATIA V5 but other CAD packages such as Inventor, Siemens NX, AutoCAD, Revit and Solidworks may be featured.
3D Geometry Models

3-Dimensional Geometry Models in Catia V5.
(Posted on Intro Page)
Rectangular Prism - Rectangle Extrusion
Cylinder - Circle Extrusion
Sphere - Revolved Semi-sphere
Cone - Revolved Right Triangle
Torus - Revolved Circle along axis X distance away
Rectangular Pyramid - Surface Modeled Triangles
Approx Practice: 45 minutes
Car Surface Model

Car Surface Model Using Catia V5
Practiced Cuts and Extrusions of model. Smoothed out car cabin and hollowed out top for Windows. Another enjoyable way to model complex and smooth shapes.
Approx Practice: 30 min
Gasket Seal Model and Drawing

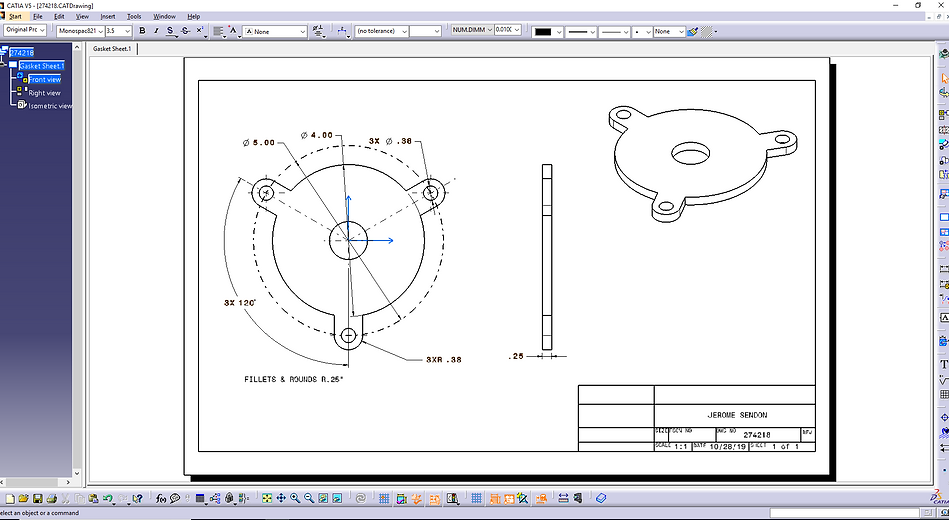
Gasket Model Using Catia V5
Sketched Concentric Circles, inside sketch circle, outside construction circle to Constrain outer holes.
Used an angled constrained to lock holes in place and sketched to connect the outer circles to main circle.
Used Hole Feature In centers of each curve.
Extruded whole sketch.
Approx Practice: 1.5 hours
Bracket Design Assembly
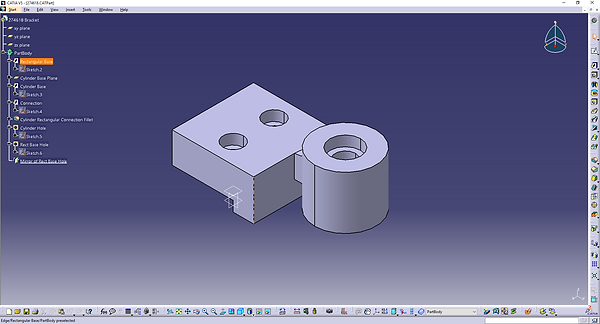

Bracket Piece
Designed using extrusions and offset planes.
Extruded Cylinder Piece and Rectangular Piece separately and connected each using an extrusion and a fillet to smooth it down.
Implemented three counter-bored holes for bracket shaft and screw holes.
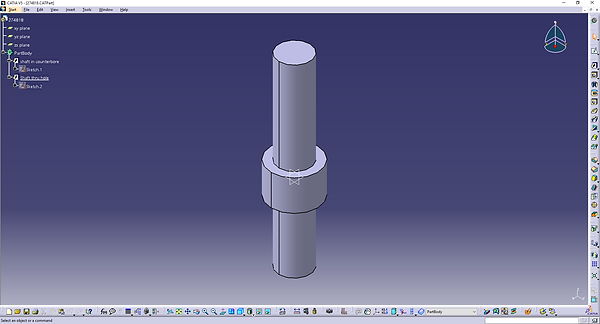
Bracket Shaft
Extruded Cylinder for middle chunk and mirror extrusion for shaft ends.
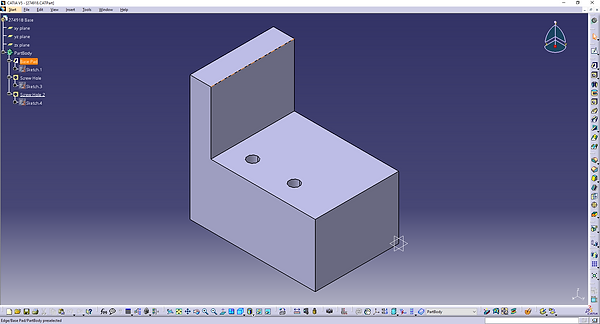
Bracket Base
2 Part - Rectangular Extrusion
Holes to Fit Screw ends.
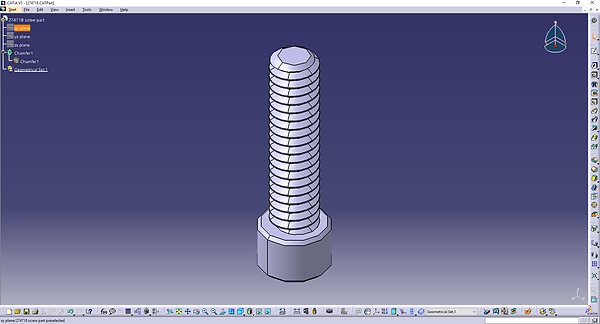
Bracket Screw Head (2x)
A universal screw piece imported from McMaster-Carr.
Thread Size: 1/4"-20
1" length
Zinc Alloy Plated Steel material
Bracket Assembly
Assembly of Bracket using all parts. Constrained using surface and insert constraints.
Approx Practice: 1.5 hours
Revit Family Model and Inventor iLogic
Modeled a 3x3x2 box on top of a 4x4x5 box in both Revit Family Models and Inventor as a single part.
Learned key basics in Revit using Reference planes, align tools, and parameter changes.
The objective was to discover if Revit is sufficient enough to model furniture and utilities and add them to an existing building. And if not, which program does it better?
Turns out, one can create models in Inventor then export them to Revit building layouts. Creating models are much easier and twice as fast in Inventor compared to Revit family modeling.
*Both Videos are playing in Realtime (not sped up)
Time to Learn: 1hr